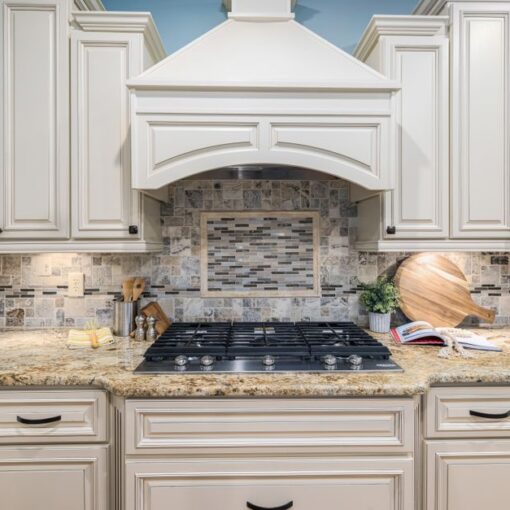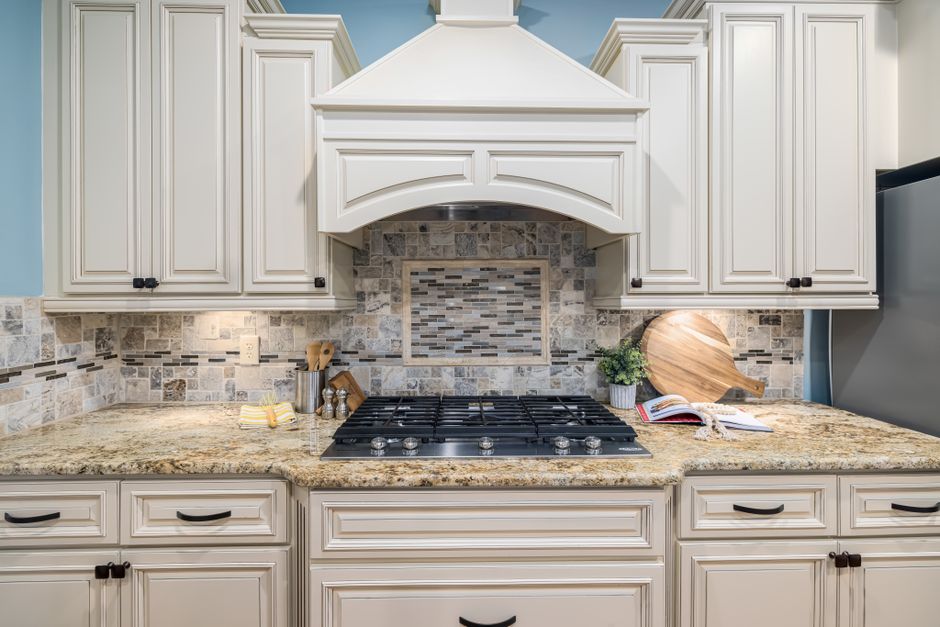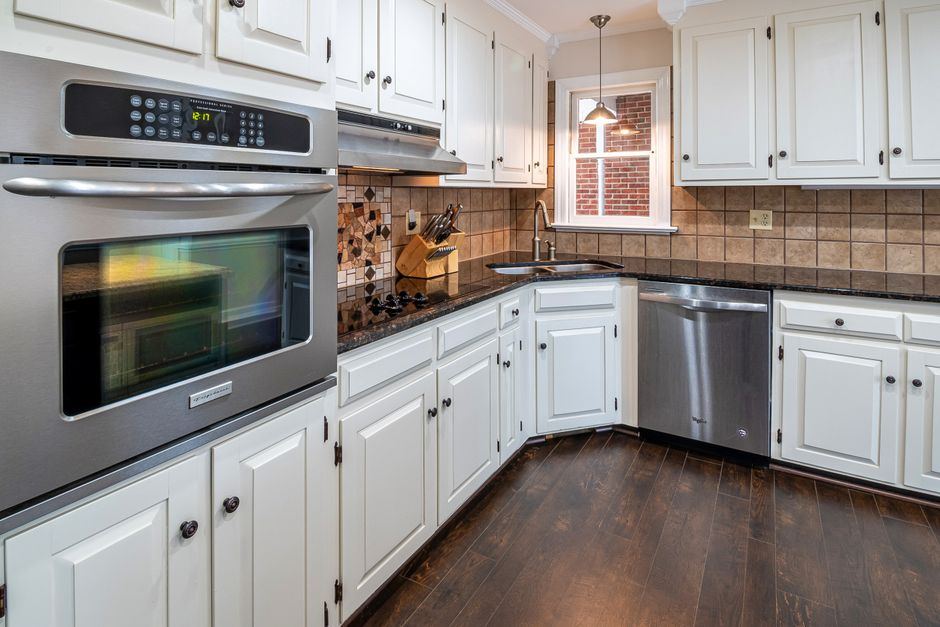
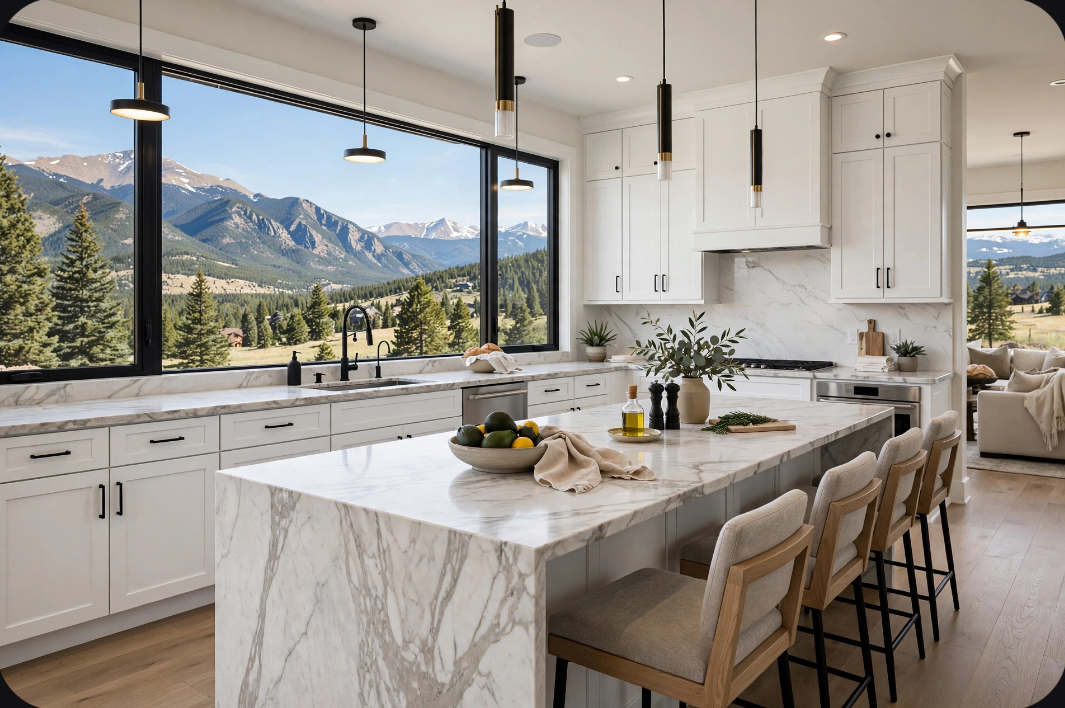
If you are searching for expert cabinet door spraying and refinishing services near me, you need a team that understands both the art of the finish and the science of preparation. A kitchen or bathroom renovation can feel overwhelming, especially when you start pricing out brand-new custom cabinetry. The good news is that professional cabinet refinishing delivers a stunning transformation at a fraction of the cost, and when done right, the results can last for a decade or more.
Table of Contents
- Why Choose Professional Cabinet Door Spraying Over DIY?
- The Step-by-Step Process: What to Expect from a Professional Refinishing Service
- Cabinet Door Spraying vs. Refinishing vs. Refacing: What Is the Difference?
- Cost and Value: Is Professional Cabinet Refinishing Worth It?
- Answering Your Top Questions About Cabinet Painting
- Why Homeowners Across Colorado Trust Cabinet Painting Colorado
- Ready to Transform Your Cabinets? Get a Free Estimate
The difference between a DIY weekend project and a professional refinish is immediately visible. Homeowners who attempt to spray their own cabinets often end up with orange peel texture, drips, dust nibs embedded in the finish, and peeling within months. A professional crew brings commercial-grade equipment, controlled environments, and years of hands-on experience to every job. The result is a smooth, factory-like finish that makes your existing cabinets look like they just arrived from a high-end showroom.
My Review of Graco FFLP Tips for Spraying Cabinets
This guide walks you through everything you need to know before hiring a cabinet refinishing professional: the process, the costs, the materials, and the questions you should ask. Whether you are in Denver, Colorado Springs, Fort Collins, or a smaller Front Range community, the principles of a quality refinish remain the same. What changes is finding a local team that knows your market, your climate, and your home’s specific needs.
Why Choose Professional Cabinet Door Spraying Over DIY?
The appeal of doing it yourself is easy to understand. A quick online search shows rental sprayers for fifty dollars a day, and paint manufacturers market DIY-friendly cabinet kits. The reality, however, is that achieving a durable, smooth, factory-grade finish requires tools and conditions that most homeowners simply cannot access.
The equipment gap is the first major hurdle. Consumer-grade sprayers, even the better airless models, cannot match the atomization and control of a commercial turbine HVLP system. HVLP stands for high volume, low pressure, and it is the industry standard for fine finishing. These systems produce a soft, controlled spray pattern that lays down paint evenly without blasting it into the air. The result is a glass-smooth surface with no brush marks, no roller stipple, and no heavy edges. Rental sprayers, by contrast, tend to spit and pulse, leaving an uneven film thickness that looks amateurish up close.
Looking for a more affordable alternative to replacing your cabinets? Our
Denver cabinet refinishing
process delivers a factory-like finish for a fraction of the cost of new cabinets.
The environment matters just as much as the equipment. Professional refinishers either work in a dedicated spray booth or construct a contained, ventilated area within your home that is sealed off from dust, pet hair, and airborne debris. A single speck of dust landing on wet cabinet enamel creates a permanent blemish. Garages and basements, where most DIY spraying happens, are full of contaminants that ruin a finish before it has a chance to cure.
Finally, there is the time factor. A professional crew can complete an average kitchen in three to five days, including all prep, spraying, drying, and reassembly. A DIY project often drags on for weeks, leaving your kitchen in a state of chaos with doors propped up in every available corner of the house. When you factor in the cost of materials, equipment rental, and your own time, the savings from doing it yourself shrink considerably.
Common DIY Mistakes That Cost Homeowners Time and Money
Skipping the deglossing or sanding step is the single most common reason for peeling paint on cabinets. Kitchen cabinets accumulate years of grease, cooking oil, and hand oils that create a slick surface. Paint applied over this contamination will not bond, no matter how expensive the product is. A proper cleaning with a TSP substitute, followed by light sanding to scuff the surface, is non-negotiable.
Using the wrong paint is another frequent error. Wall paint, even high-quality interior latex, is not formulated for the abuse that cabinets take. Cabinet enamel is harder, more resistant to moisture and staining, and designed to withstand repeated cleaning. Brushing on wall paint leaves lap marks and soft ridges that collect dirt. Spraying a proper cabinet-grade coating creates a uniform film that cures to a hard, cleanable surface.
Spraying in a dusty garage or basement guarantees a gritty finish. Even after sweeping and wiping down the area, airborne particles settle on wet paint within minutes. Professionals control the environment with plastic sheeting, air filtration, and careful timing between coats.
The Step-by-Step Process: What to Expect from a Professional Refinishing Service
Understanding the full workflow helps you evaluate contractors and set realistic expectations for your project. A reputable cabinet refinishing company follows a structured process that leaves little to chance.
The initial assessment and color consultation sets the foundation. A technician visits your home to inspect the cabinet material. Solid wood, MDF, plywood, laminate, and thermofoil all require different preparation strategies and primer selections. The consultation also covers sheen options. Satin finishes hide minor imperfections and fingerprints well, while semi-gloss offers more reflectivity and is slightly easier to wipe down. The color selection process should include physical samples viewed in your kitchen’s actual lighting, since colors shift dramatically between a showroom and your home.
Preparation and protection comes next. All hardware, hinges, and drawer pulls are removed and labeled so everything returns to its original location. Doors and drawer fronts are numbered on the back with a system that matches them to their specific openings. The work area is sealed off with plastic sheeting to contain dust and overspray, and floors and countertops are covered with rosin paper and drop cloths.
Cleaning and degreasing is the step that separates professionals from amateurs. Every surface receives a thorough wipe-down with a degreasing agent that cuts through kitchen oils. This is not a quick once-over. It is a methodical cleaning that ensures nothing interferes with primer adhesion.
Sanding and priming follows the cleaning. A light scuff sand with 220-grit paper gives the primer a mechanical bond. The primer itself is a high-adhesion formula, often a shellac-based or urethane-modified product, that blocks stains, seals knots in wood, and creates a uniform base layer. Tinting the primer toward the final color improves coverage and depth.
Spraying the finish is where the transformation becomes visible. Multiple thin coats of a professional-grade cabinet enamel are applied with a turbine HVLP sprayer. Each coat is allowed to flash off before the next is applied, building a durable film that resists chipping, yellowing, and moisture damage. The most common professional products include waterborne urethane alkyds and two-component conversion varnishes, both of which outperform anything available at a retail paint counter.
Reassembly and the final walkthrough complete the job. Doors and drawers are rehung, hardware is reinstalled, and the homeowner inspects every surface. Any touch-ups are addressed on the spot, and care instructions are provided for the curing period.
The Spraying vs. Brushing Debate: Why Spraying Wins
Spraying eliminates brush strokes and roller texture entirely. Even the finest brush leaves microscopic ridges that catch light and collect grime over time. A sprayed finish is optically flat, reflecting light evenly across the entire surface.
Spraying reaches into corners, routed details, and raised panel profiles that brushes and rollers cannot coat evenly. On a Shaker-style door with a recessed center panel, a brush leaves heavy buildup in the corners. A spray gun lays down a consistent film thickness across every contour.
Spraying also produces a harder, more durable cure. The fine atomization allows the coating to flow out and level before it sets, creating a denser film with fewer microscopic voids. This translates to better moisture resistance and longer life in a kitchen environment.
How Long Does a Full Kitchen Refinish Take?
A standard kitchen with twenty to thirty doors and drawers typically takes three to five days from start to finish. Day one covers removal, cleaning, sanding, and priming. Day two involves the first finish coats and drying time. Day three allows for final coats and extended curing before reassembly on day four or five.
Several factors can extend the timeline. Larger kitchens with more doors naturally take longer. Intricate door styles with multiple raised panels or heavy routing require more careful spraying. High humidity slows drying times, which is relevant in Colorado during the monsoon season in July and August. A professional team accounts for these variables in the initial estimate.
Cabinet Door Spraying vs. Refinishing vs. Refacing: What Is the Difference?
These terms are often used interchangeably, but they refer to distinct services with different scopes and price points.
Spraying refers specifically to the application method. It describes using a spray gun to apply paint or clear lacquer, as opposed to brushing or rolling. Spraying is the technique that produces the smoothest possible finish, and it is the standard method used by professional cabinet painters.
Refinishing is the full process of restoring existing cabinet doors and boxes. It includes stripping old finish if necessary, sanding, priming, and applying a new coating, whether paint or stain. This is what most homeowners need when their cabinets are structurally sound but cosmetically tired. Refinishing preserves the existing layout and door style while completely changing the color and sheen.
Refacing is a more extensive service that replaces the door and drawer fronts entirely while keeping the existing cabinet boxes. The boxes are then veneered to match the new doors. Refacing costs significantly more than refinishing, typically two to three times as much, because it involves manufacturing new components. It makes sense when the door style is dated beyond what paint can fix, or when the doors are damaged beyond repair.
When to refinish versus replace comes down to the condition of the cabinet boxes. If the boxes are square, the face frames are solid, and the drawer glides function smoothly, refinishing is the smart choice. It saves fifty to seventy percent compared to full replacement and avoids the disruption of demolition. If the boxes are water-damaged, delaminating, or built from particleboard that is crumbling, replacement becomes the more practical option.
Can You Spray Laminate or Thermofoil Cabinets?
Yes, laminate cabinets can be sprayed successfully, but they require specialized primers and meticulous surface preparation. A high-bond primer like a shellac-based or urethane-modified formula is essential to achieve adhesion on the slick plastic surface. Without it, the paint will peel off in sheets within months.
Thermofoil cabinets present a greater challenge. Thermofoil is a thin vinyl layer heat-sealed over an MDF core. Over time, especially near heat sources like toasters and ovens, the vinyl can bubble and separate from the substrate. Painting over damaged thermofoil does not fix the underlying problem. A professional will assess whether the thermofoil is still firmly bonded before recommending refinishing. In some cases, replacement doors are the more durable long-term solution.
Cost and Value: Is Professional Cabinet Refinishing Worth It?
Professional cabinet refinishing in Colorado typically ranges from three thousand to eight thousand dollars for an average kitchen, depending on the number of doors and drawers, the complexity of the door style, and the condition of the existing finish. Kitchens with islands, large pantry cabinets, or extensive trim work fall toward the higher end of the range.
The return on investment makes refinishing one of the most cost-effective kitchen upgrades available. Real estate professionals consistently rank kitchen updates among the top improvements for resale value, and refinishing recoups an estimated seventy to eighty percent of its cost at sale. A fresh, modern cabinet color transforms the entire room without the expense and disruption of a full gut renovation.
For comparison, refacing typically runs from eight thousand to fifteen thousand dollars, while full cabinet replacement starts around fifteen thousand and can easily exceed thirty thousand for custom work. Refinishing delivers a comparable visual impact at a fraction of the cost.
When comparing quotes, confirm what is included. A comprehensive quote covers hardware removal and reinstallation, surface preparation, primer, finish coats, workspace protection, and cleanup. Ask about warranties. A reputable company stands behind its work with a written guarantee, typically covering peeling and adhesion failure for a period of one to three years.
Answering Your Top Questions About Cabinet Painting
These are the questions homeowners ask most often before committing to a cabinet refinishing project.
Can I pay someone to paint my cabinets? Absolutely. Professional cabinet painting is a standard service offered by reputable painting contractors across Colorado. It is not a niche or unusual request. Hiring a pro saves you the expense of buying or renting equipment, the frustration of learning a new skill on your own kitchen, and the risk of a subpar result that you have to live with every day.
What do professional painters use to paint kitchen cabinets? Professionals use commercial turbine HVLP or air-assisted airless spray systems that atomize the coating into a fine, even mist. The coatings themselves are professional-grade cabinet enamels, typically waterborne urethane alkyds like Sherwin-Williams Emerald Urethane or Benjamin Moore Advance, or two-component conversion varnishes for maximum durability. These products are not available at big-box home improvement stores in the same formulations that professionals purchase through dedicated supply channels.
How to prep cabinet doors for painting? The preparation sequence is methodical. First, remove all hardware and label everything. Second, clean every surface thoroughly with a degreaser to strip away kitchen oils. Third, scuff-sand with 220-grit paper to create a mechanical bond for the primer. Fourth, vacuum all dust and wipe down with a tack cloth. Fifth, apply a bonding primer appropriate for the substrate. Sixth, lightly sand the primer with 320-grit paper to knock down any raised grain. Seventh, perform a final wipe-down before spraying the finish coats. Skipping any of these steps compromises the final result.
How to refinish cabinets with paint? The full refinishing workflow follows the process outlined earlier in this guide: assessment, protection, cleaning, sanding, priming, spraying, and reassembly. The single most important variable is patience. Rushing the drying time between coats causes solvent entrapment, which leads to soft finishes, cloudiness, and eventual failure. Each coat must cure according to the manufacturer’s specifications before the next is applied.
Why Homeowners Across Colorado Trust Cabinet Painting Colorado
Colorado homes present unique conditions that a local refinishing team understands. The dry climate and high UV exposure at altitude can cause some finishes to cure differently than they would at sea level. Temperature swings between day and night affect drying schedules, especially in unconditioned spaces. A team with deep experience in the Front Range and mountain communities knows how to adjust for these variables.
Local expertise also means familiarity with the architectural styles common to the region. From the Craftsman bungalows of Denver’s Washington Park to the mid-century ranches of Colorado Springs and the new construction in Fort Collins and Loveland, each home type has cabinetry with distinct characteristics. An experienced local contractor has worked on your style of home before and knows what to expect behind those doors.
Verified credentials matter. Look for a company with strong ratings from local business bureaus, chamber of commerce memberships, and EPA Lead-Safe certification, which is required by federal law for any contractor working on homes built before 1978. A gallery of before-and-after photos, ideally showing cabinet projects specifically rather than just general painting work, gives you a realistic preview of what to expect.
A satisfaction guarantee reduces your risk. The best contractors in the market operate with a “make it right” policy. If something is not up to standard at the final walkthrough, they address it without excuses or additional charges.
Ready to Transform Your Cabinets? Get a Free Estimate
The fastest way to know what your cabinet refinishing project will cost is to schedule an on-site consultation. A professional estimator visits your home, inspects the cabinets, discusses color and sheen options, and provides a detailed written quote with no obligation.
You will receive a line-item estimate that breaks down the scope of work, the materials to be used, the projected timeline, and the total investment. You will also see physical color samples in your own kitchen’s light, which is the only way to make a confident decision.
There is no pressure, no hidden fees, and no gimmicks. Just honest advice from a team that has transformed hundreds of kitchens across Colorado. Contact Cabinet Painting Colorado today to schedule your free estimate and take the first step toward the kitchen you have been imagining.