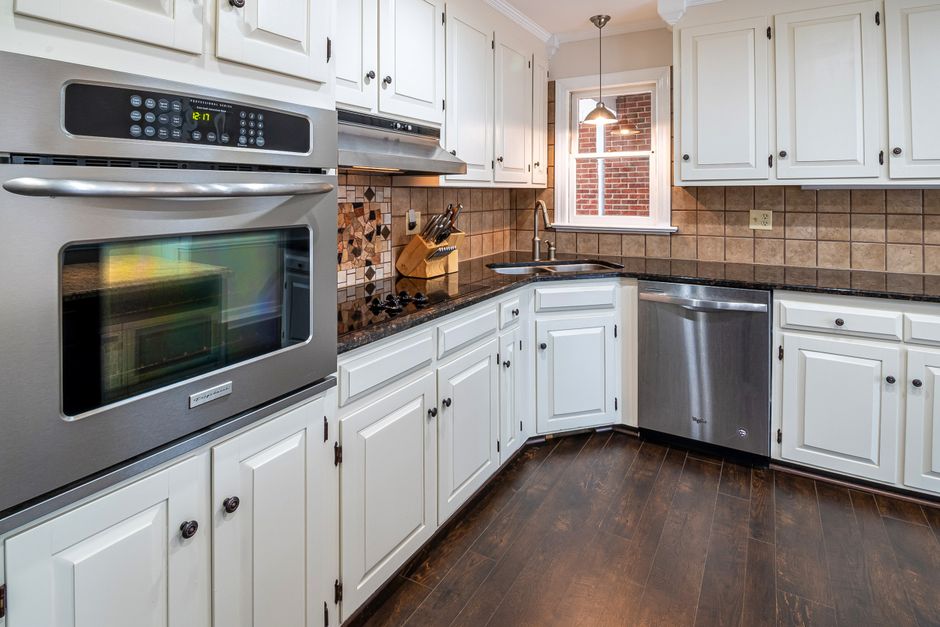
If your Denver kitchen still has golden oak cabinets from the 1990s, you have probably asked this question at least once: can you actually paint over stained wood, or does the stain have to come off first? The short answer is yes, stained cabinets can be painted. The longer answer is that stain changes the rules of the job. Stained wood is not a clean slate. It is an open-pored, sometimes oily surface that can bleed color, reject paint, and telegraph every sanding scratch through a thin finish. Denver homes add their own variables, from dry winter air to cabinets that have spent decades absorbing cooking grease.
The good news is that paint over stained cabinets is a well-tested process when the prep is done correctly. Bonding primers and stain-blocking primers exist specifically for this situation, and a durable enamel topcoat will outperform standard wall paint by a wide margin on cabinet doors and drawer fronts. What fails is not the idea. It is the shortcut.
The Short Answer on Painting Stained Cabinets
Yes. You can paint over stained cabinets, including stained oak, as long as you build the right foundation. That means a clean surface, a mechanically dulled surface, and a primer designed to bond to wood and block whatever is underneath.
A few practical facts shape the whole project:
- A bonding primer performs best on wood. Standard latex primer is not the right product for this job.
- Enamel paint, the category used for trim, cabinets, and doors, is considerably more durable than ordinary wall paint.
- Stain-blocking or bonding primers are the recommended base when you are covering stained wood.
- If the cabinets were previously painted and the finish is peeling or bubbling, sanding is required before anything else goes on.
- Cleaning and sanding come before primer. Prep products and degreasers are used first, not last.
Notice that none of these steps involve stripping the stain back to bare wood. Removing old stain is one option, but it is the slowest and messiest one, and it is rarely necessary if the existing finish is intact.
Why Stained Cabinets Behave Differently Than Painted Ones
Stained wood is porous. The stain sits in the grain and inside the open pores of species like oak, which is exactly why oak takes stain so unevenly in the first place. Those pores hold pigment, oils, and years of kitchen residue. When paint goes on top without a proper barrier, three things tend to happen.
First, tannins and pigment can migrate upward through the new coating, a problem commonly called bleed-through. It shows up as a yellowish or brownish shadow, and it usually appears days or weeks after the job looks finished. Second, adhesion fails on glossy or greasy areas. Cabinet doors near the stove collect a fine film of cooking oil that soap and water alone will not lift. Third, brush and roller marks magnify on a stained surface because the wood grain and the applied texture compete with each other.
Professional forums and homeowner threads on this topic disagree about method far more than they disagree about the outcome. Some painters strip, some sand aggressively, and some rely on a primer system. What almost everyone agrees on is that cleaning, dulling the surface, and choosing a primer made for stained wood are the non-negotiable parts.

The 2026 Prep Sequence for Stained Cabinets
The sequence below reflects what actually holds up in a working kitchen, not what saves an afternoon.
Step 1: Degrease Every Surface
Start with a degreaser or a TSP-style cleaner on all cabinet boxes, doors, and drawer fronts. Pay attention to the area above and beside the range, the handles and pulls, and the top edges of upper doors where airborne grease settles. Wipe with clean water afterward and let everything dry completely. Primer will not bond to a greasy film, no matter how good the primer is.
Step 2: Scuff Sand Instead of Stripping
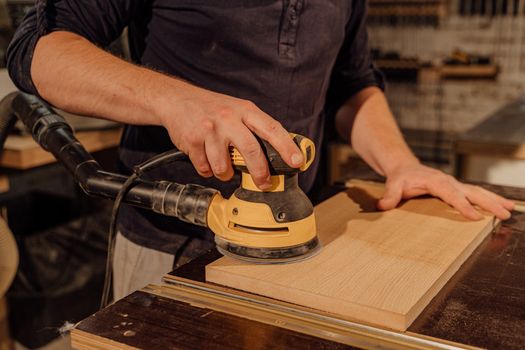
You do not need to remove the stain. You do need to break the surface so the primer has something to grip. A light sanding across the whole face, plus extra attention to any chipped or glossy spots, is the standard approach. If the cabinets were previously painted and the coating is peeling or bubbling, those areas need to be sanded back and stabilized because paint will keep failing there. Wipe off all dust before moving on.
Step 3: Fill the Grain on Oak
Open-grain woods like oak will show their texture through paint. Some homeowners like that look and want the wood character to remain visible. Others want a smooth, factory-flat finish that hides the grain entirely. If you want the smooth result, grain filling happens before the primer, not after, and it is one of the biggest reasons a sprayed cabinet finish looks different from a brushed one.
Step 4: Prime With a Bonding or Stain-Blocking Primer
Choose a primer formulated for stained wood. A stain-blocking or bonding primer creates the solid base that keeps pigment from creeping through and gives the topcoat something to hold onto. This is the step that separates a finish that lasts from one that shows brown streaks by spring.
Step 5: Use an Enamel Topcoat, Not Wall Paint
Cabinet doors get touched, bumped, and wiped constantly. Enamel, the same category used on trim and doors, is much more durable than standard wall paint. A sprayed application lays down a thinner, more even film than a brush or roller, which is why sprayed finishes read as smoother and clean up more easily over time.
Matching the Prep to the Condition of Your Cabinets
Not every stained kitchen needs the same amount of work. Use the surface condition to decide where to focus.
| What You See | What It Means | Prep Focus |
|---|---|---|
| Bare stained wood, intact finish | Pores are open and may hold pigment or oil | Degrease, light sand, grain fill if desired, stain-blocking primer |
| Greasy film near the range | Primer will not bond to oil | Degreaser or TSP-style cleaner before any sanding |
| Previously painted, peeling or bubbling | The existing coating is failing | Sand the failing areas back before priming |
| Dark stain under a light new color | High risk of bleed-through | Stain-blocking primer is essential |
Can You Paint Stained Cabinets Without Sanding?
Products marketed as no-sand cabinet coatings exist, and they typically pair a prep cleaner with a bonding primer. For a lightly used bathroom vanity in good condition, that approach can work. For a kitchen that has cooked thousands of meals, it is a gamble.
The reason is simple. No-sand systems still require the surface to be clean and sound. They cannot fix peeling paint, chipped edges, or a layer of grease. When those conditions are present, skipping sanding just moves the failure a few months down the road. Cleaning with a dedicated prep cleaner is a reasonable starting point, and light sanding with TSP or a degreaser is the more reliable route for stained wood that has been in service for years.
Why Denver Kitchens Need a Little Extra Attention
Colorado’s dry air and wide temperature swings affect how coatings cure. A finish applied in a cold garage or during a temperature drop may not harden the way the product data sheet expects. That matters more for cabinets than for walls because cabinet coatings are handled daily within days of installation.
Homeowners across the Denver metro, including Aurora, Lakewood, Littleton, Arvada, and Boulder, tend to face the same combination: original oak cabinets, a kitchen that has been heavily used, and a budget that does not stretch to full replacement. Painting is usually the practical answer. Getting the prep and the application environment right is what decides whether that answer holds up.
Painting Versus Replacing or Restaining
Three options sit on the table for stained cabinets. Replacement gives you new boxes and new doors, along with the cost and disruption of a full remodel. Restaining keeps the wood look but is labor intensive, and gel stain still requires decent prep including light sanding, a degreaser or TSP, and careful wiping. Painting changes the color entirely and, when sprayed, produces the most uniform result of the three.
For most homeowners weighing paint over stained cabinets, the deciding factor is not the color. It is the finish quality. A brushed or rolled coating on stained wood will always show some texture, and on open-grain oak that texture compounds. A sprayed factory-grade finish, such as a 2K polyurethane or precatalyzed lacquer, lays down flatter and resists chipping and cleaning chemicals far better.

What Changes When a Specialist Sprays Your Cabinets
Prep is where a professional cabinet spraying process separates itself from a general painting job. Dustless HEPA sanding keeps the fine dust out of your kitchen and out of the wet coating. Doors and drawer fronts are typically sprayed off-site or in a controlled area so the finish cures evenly, then reinstalled.
The timeline is short compared with replacement. A typical project runs five to seven days rather than weeks, and the cost sits well below new cabinetry. A workmanship warranty backs the result so a failure like bleed-through or adhesion loss is the contractor’s problem, not yours. Free local estimates make it easy to compare the painting route against replacement before committing. You can learn more at Cabinetspainting.com.
One caution worth repeating: stain is not the obstacle. Poor prep is. Whichever route you choose, clean first, dull the surface, prime with a product made for stained wood, and finish with an enamel or lacquer topcoat that can take daily wear.
Frequently Asked Questions
Do I have to strip the stain off before painting?
No. Stripping back to bare wood is one option, but it is the slowest and messiest. If the existing stained finish is intact and not peeling or bubbling, you can degrease the surface, sand it lightly to dull the sheen, and apply a stain-blocking or bonding primer made for stained wood. The primer does the work that stripping would otherwise do.
Will the old stain bleed through the new paint?
It can, especially when you are covering a dark stain with a light color. Bleed-through typically shows as a brown or yellow shadow that appears after the job looks complete. A stain-blocking primer formulated for stained wood is the standard defense. Skipping primer or using a standard latex product is the most common reason bleed-through happens.
Is regular wall paint good enough for cabinets?
No. Enamel, the category used for trim, cabinets, and doors, is much more durable than ordinary wall paint. Cabinet doors and drawer fronts are handled and wiped constantly, so they need a coating that resists chipping and cleaning. A sprayed enamel or lacquer finish also lays down more evenly than a brushed or rolled one.
Can I paint over cabinets that are already painted?
Yes, provided the existing finish is in good shape. If the current coating is peeling or bubbling, those areas need to be sanded back before anything new goes on, because paint will continue to fail there. Clean the surfaces first, dull them lightly, and then prime before applying your topcoat.
Can I skip sanding if I use a no-sand primer?
Sometimes, but not reliably. No-sand systems still require a clean, sound surface, and they cannot repair peeling paint or cut through years of cooking grease. For a lightly used vanity you may get away with it. For a working kitchen with stained oak cabinets, light sanding plus a degreaser or TSP-style cleaner is the more dependable path.